
Uploading your GPX
Every way to get your track into an event, and which one applies to your device.
An organiser publishes the event; each runner adds their own track to it. You add yours from the event page with Add my run, which opens an upload step with three tabs: Upload GPX for a file, Intervals.icu, and Watch for a connected device.
Which tab you want depends on your watch. Intervals.icu is the easiest route for Garmin and many other brands: create an Intervals.icu account and connect the watch directly there. Exporting a GPX still works from any device and any service.
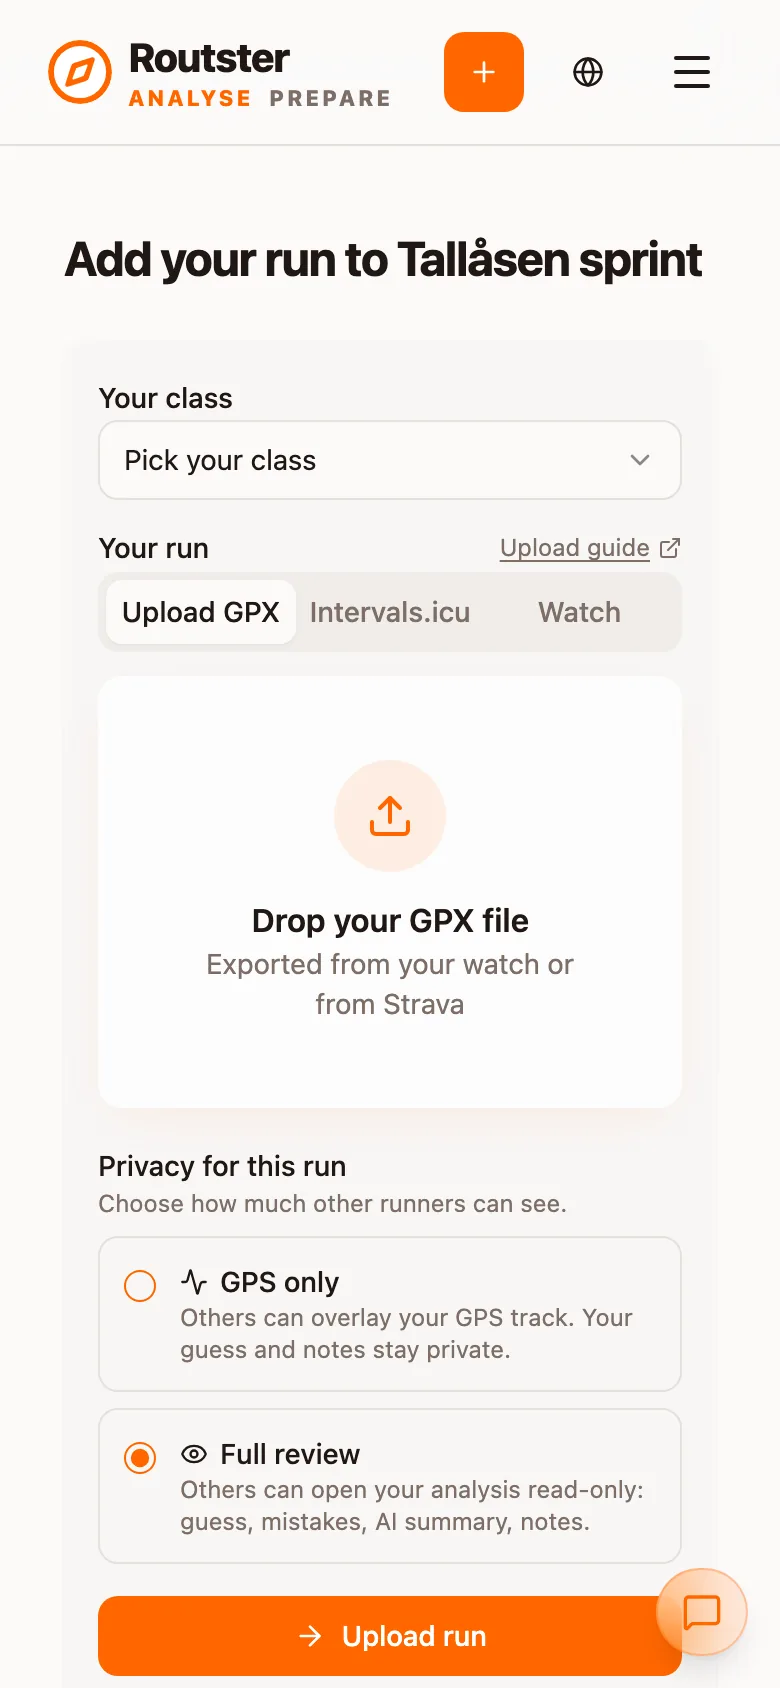
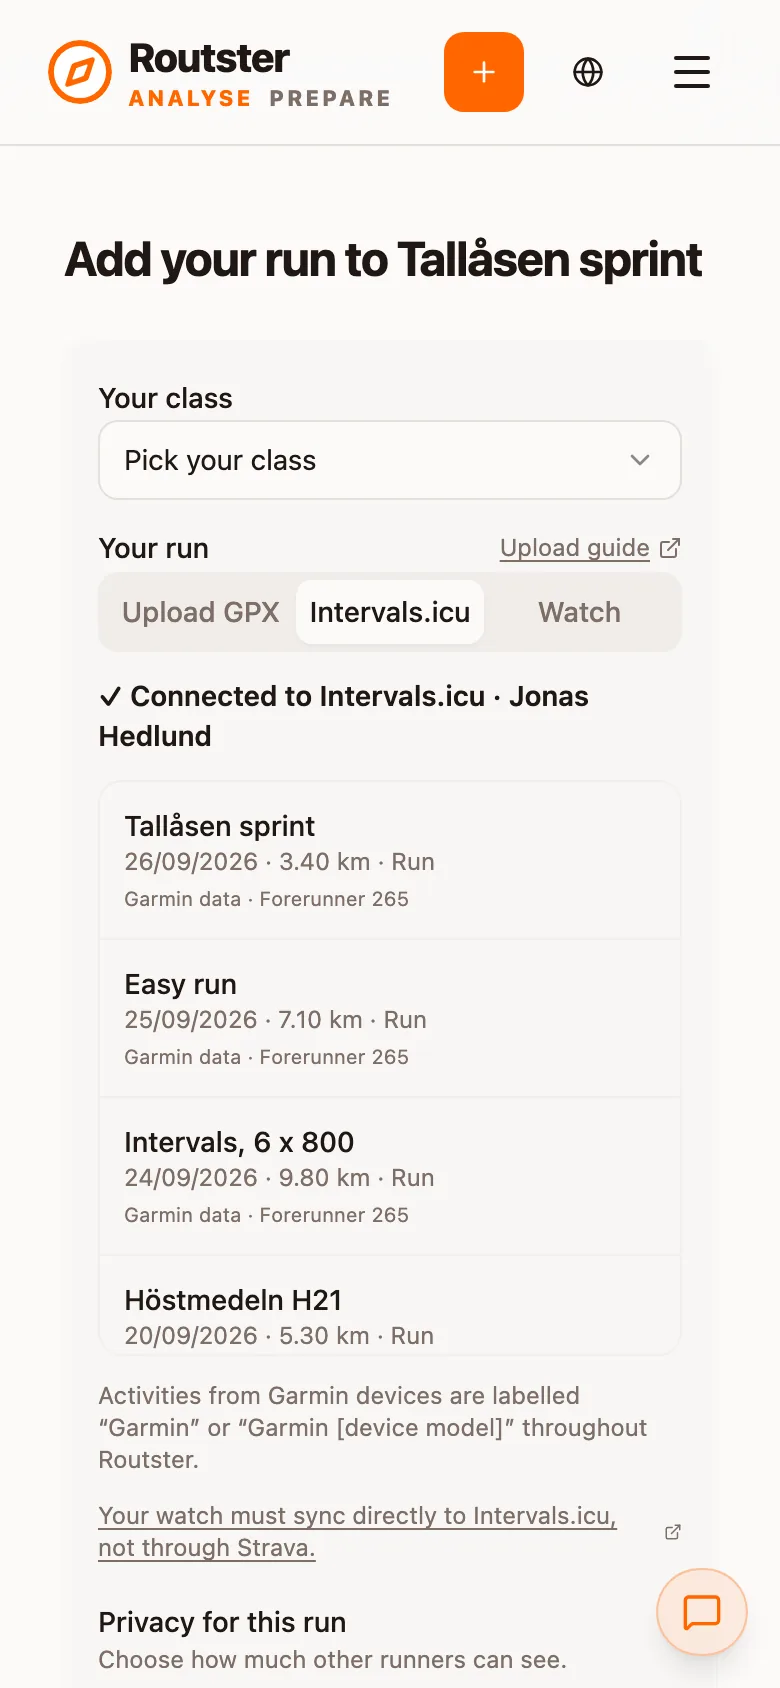
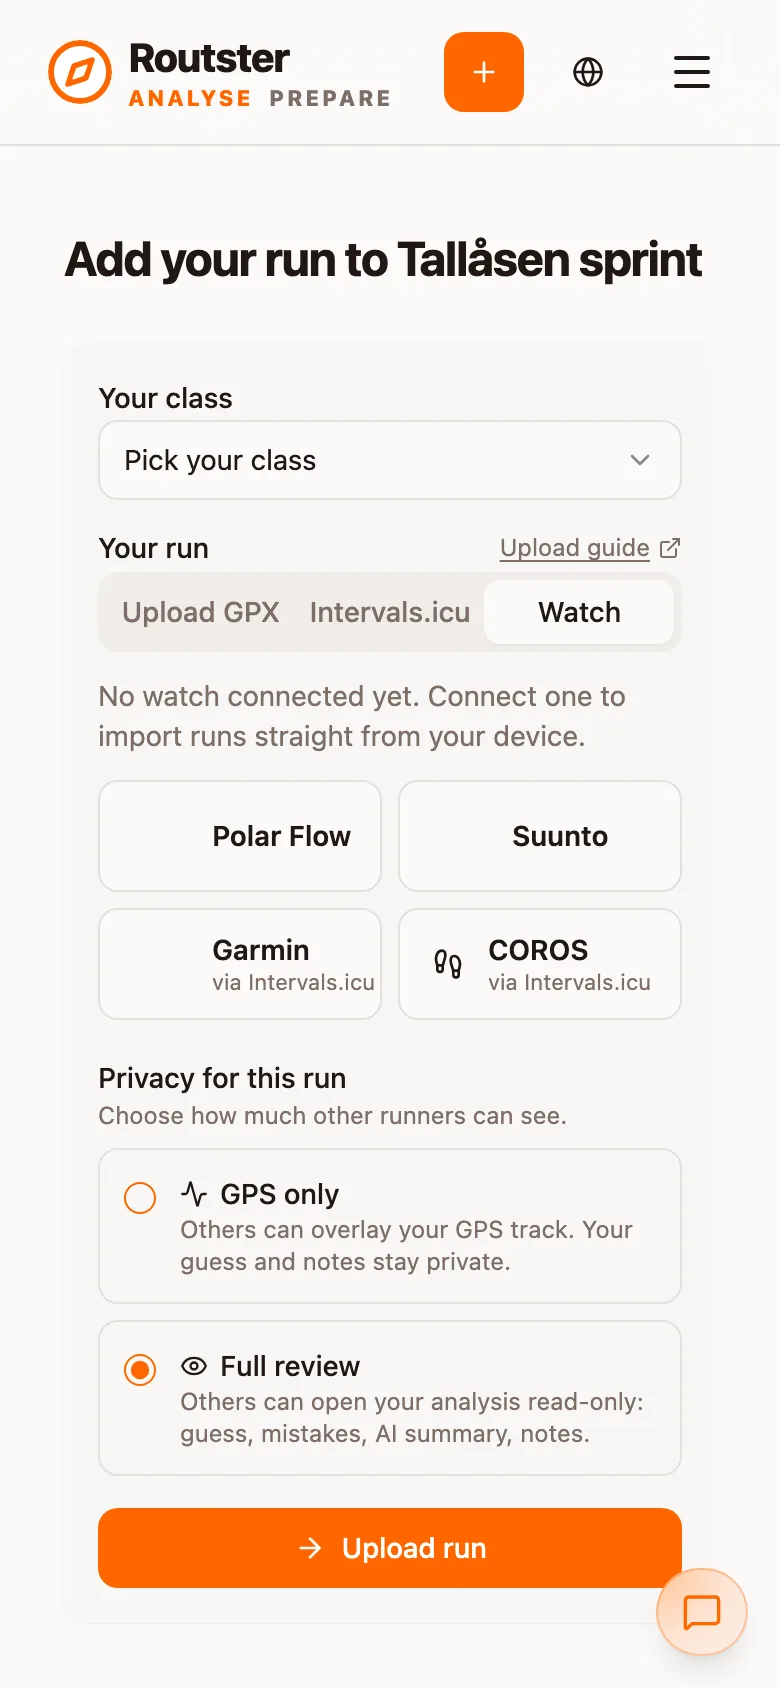
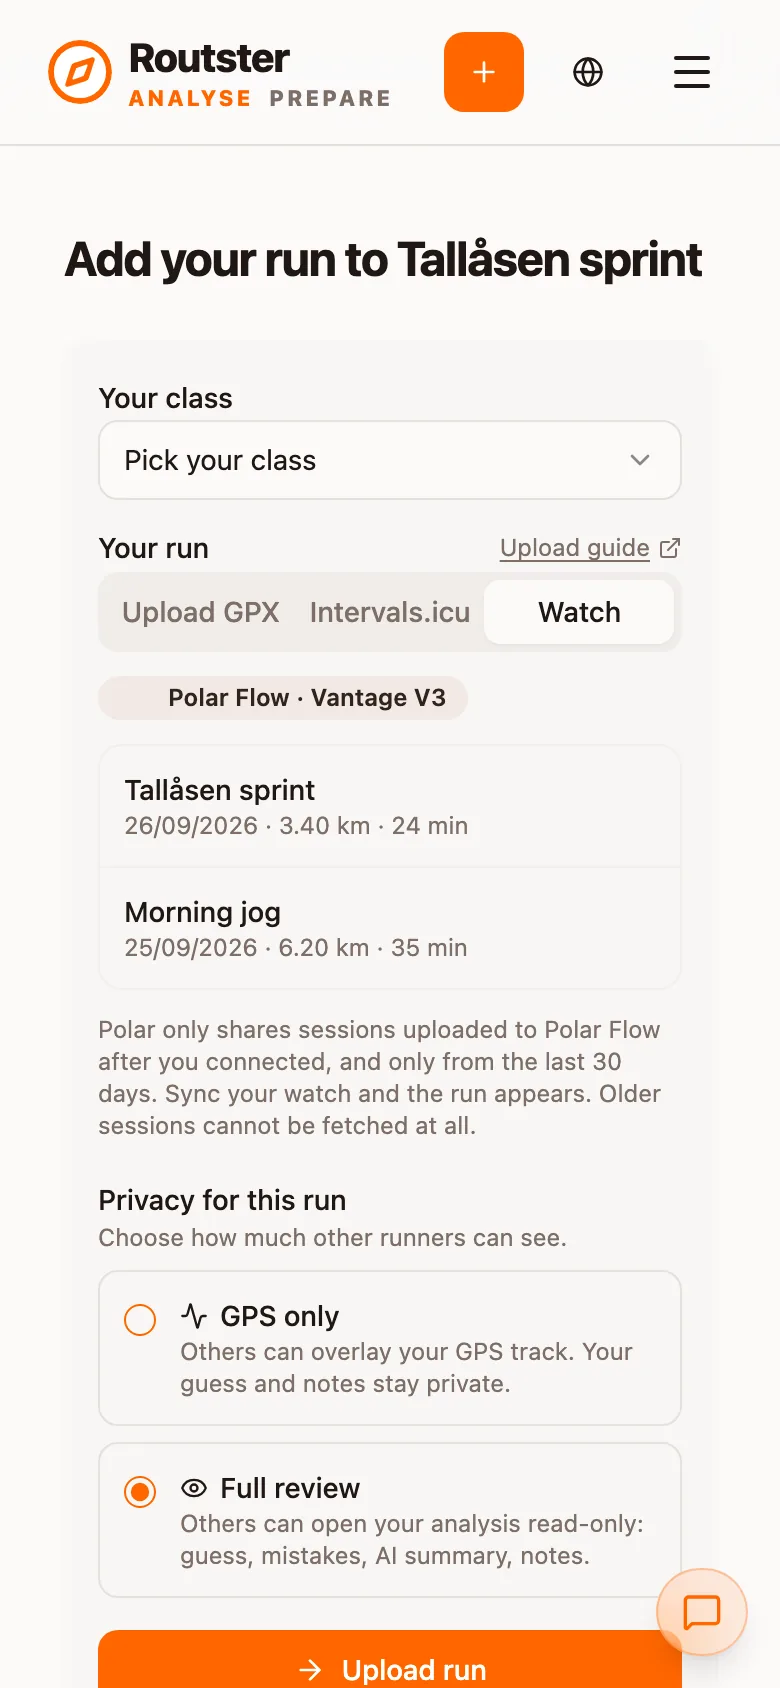
Which route in applies to you
| Your device | Route in | Status |
|---|---|---|
| Polar | Connect Polar Flow, under the Watch tab | Available |
| Suunto | Connect Suunto, under the Watch tab | Available |
| Garmin | Connect Garmin directly to Intervals.icu | Available via Intervals.icu |
| Coros | Connect Coros directly to Intervals.icu | Available via Intervals.icu |
| Strava | Export a GPX from Strava and upload it | Direct import coming soon |
A GPX file always works
Intervals.icu
Intervals.icu can bring Garmin, Coros, Polar, Suunto and other supported watch data into Analyse. Imported tracks use the privacy level you choose, so they can be shared with clubmates when you select GPS only or Full.
Step 1. Create an Intervals.icu account
Step 2. Connect Garmin or your watch directly to Intervals.icu
Step 3. Connect Intervals.icu to Routster
Step 4. Choose your activity
Connect the watch directly, not through Strava
Let Analyse import new activities automatically
After connecting Intervals.icu, Polar or Suunto, open Profile → Events & import and turn on automatic activity import. You can limit it to your clubs or include every published event visible to you. Intervals.icu notifies Analyse when a new activity has finished processing; a scheduled sweep catches anything a provider notification misses.
Analyse can use your name in a published result list or the organiser's optional start list to identify your expected class. It still imports nothing unless your GPS track positively follows that class's ordered controls. If there is no list, a clear match between your GPS track and one course, control by control in order, can identify the class. Date, proximity, distance, or there being only one class is never enough on its own. Your event page shows the detected class; if it is wrong, select the correct class there and Routster keeps your correction.
Ambiguous is safer than confidently wrong
Polar
Polar connects directly, so a run reaches Analyse without a file ever being exported. It has one condition that matters more than any other on this page.
Connect before you race
Step 1. Connect Polar Flow
Step 2. Run the race
Step 3. Sync the watch to Polar Flow
Step 4. Load activities and pick the run
Sync now means queued, not done
Suunto
Suunto connects under the same Watch tab, and once connected it works the same way: load the activities, pick the session, and the track is attached to your run.
Step 1. Connect Suunto
Step 2. Sync the watch to the Suunto app
Step 3. Load activities
Step 4. If the run is not listed, fetch history
Connecting after the race can still work
Beyond 90 days, or if the run still does not appear, export a GPX from wherever the session ended up and upload the file instead.
Garmin
Use the Intervals.icu route above: create an Intervals.icu account and connect Garmin Connect directly in its Connections settings. A GPX export remains a useful fallback. The steps are in From Garmin Connect.
Coros
Connect Coros directly to Intervals.icu and use the Intervals.icu tab, or upload a GPX file.
Strava
A direct import from Strava is coming soon. Until then, export the GPX file from Strava and upload it. The steps are under Getting the file.
Getting the file
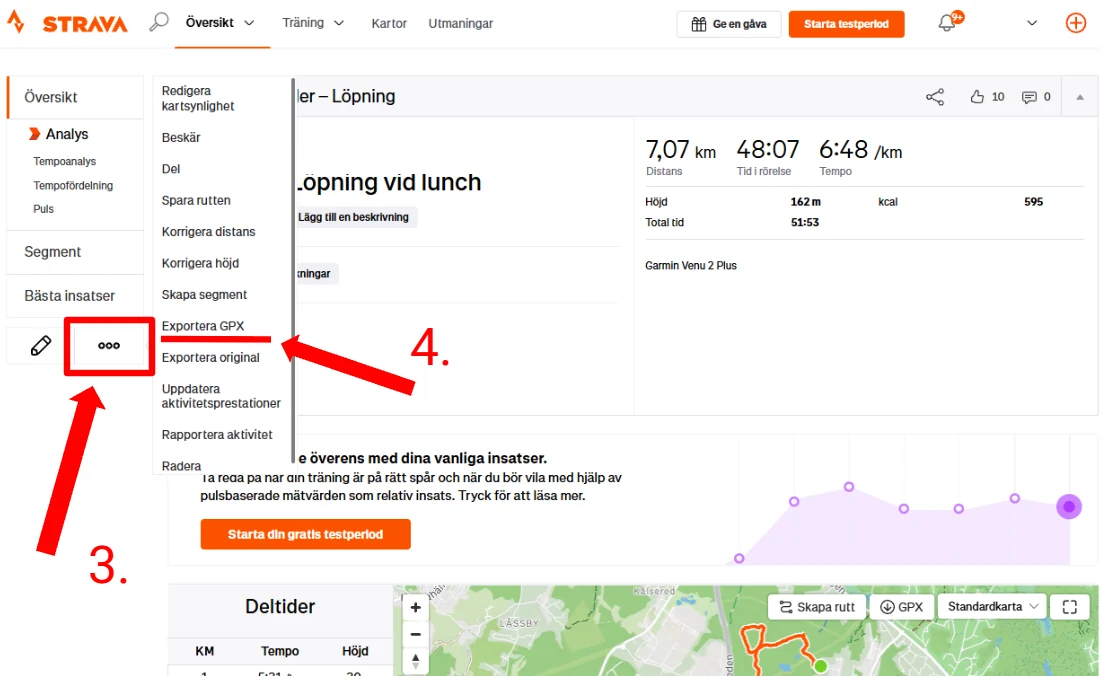
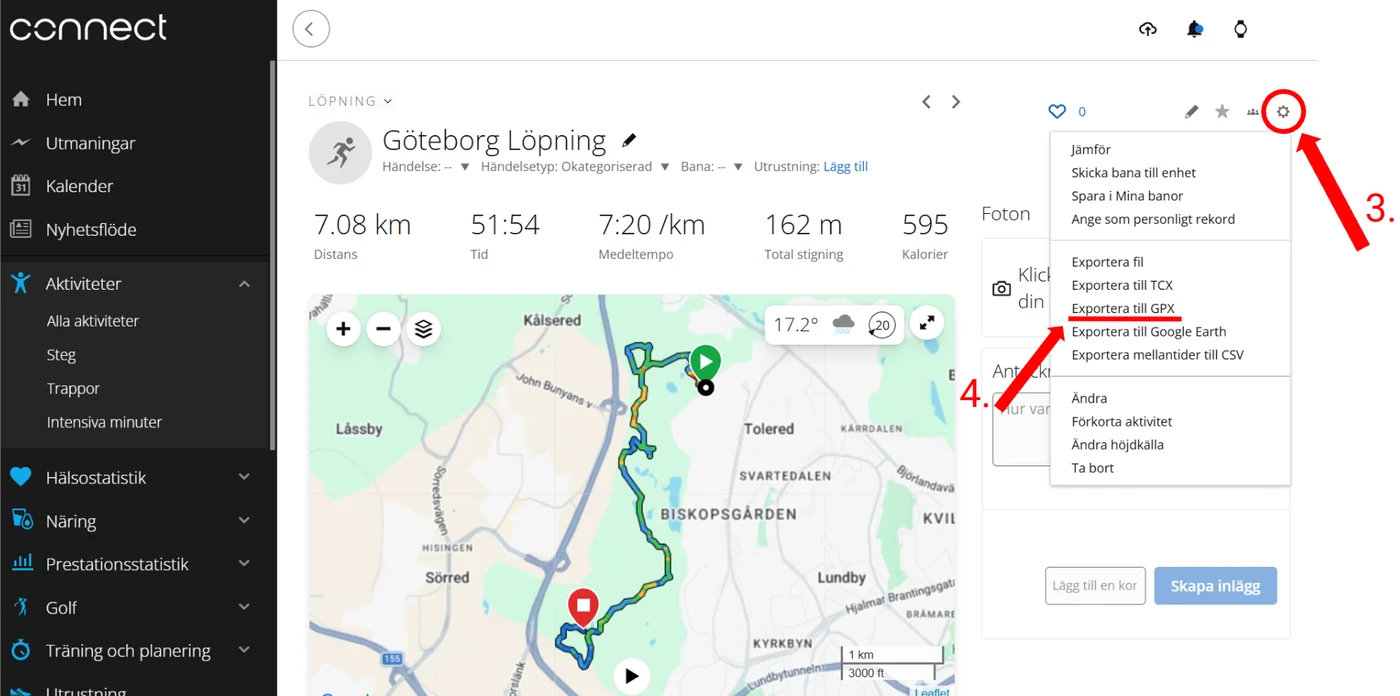
Both services export a GPX from an activity you have already recorded. A browser on a computer is easiest; on a phone, the export option is harder to find in both.
From Strava
Step 1. Open Strava in a browser and sign in
Step 2. Open the activity you want to upload
Step 3. Select the three dots on the left of the page
Step 4. Select Export GPX
From Garmin Connect
Step 1. Open Garmin Connect in a browser and sign in
Step 2. Open the activity you want to upload
Step 3. Select the gear icon in the top right corner
Step 4. Select Export to GPX
Uploading the file
The remaining steps are the same whichever service the file came from.
Step 5. Open the event
Step 6. Select Add my run
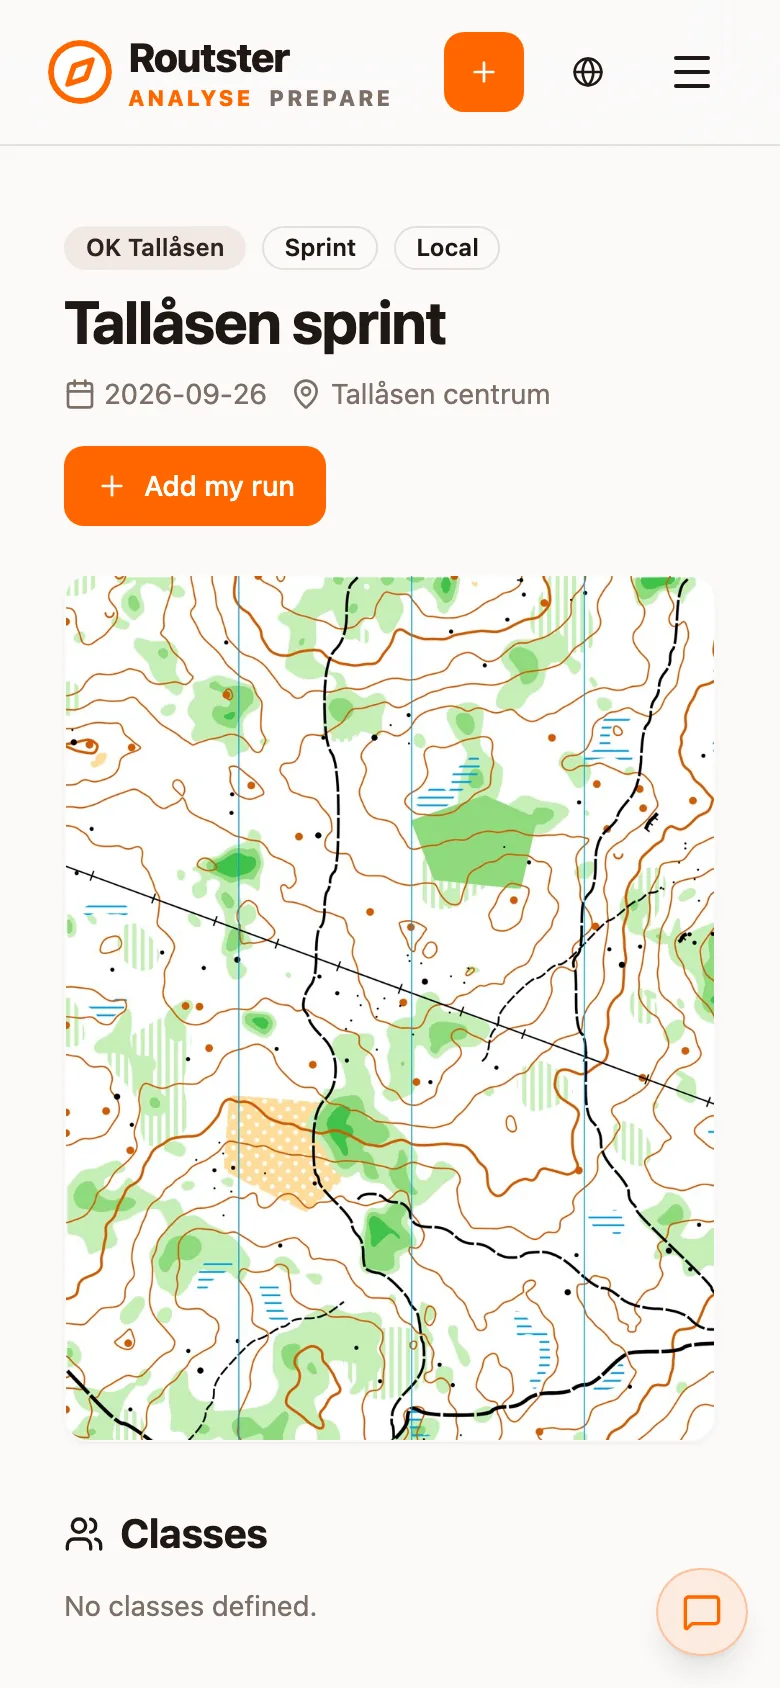
Step 7. Upload the GPX in the box
.gpx. Pick your class, and the analysis is built from the track.